Google Cloud Functions are Google’s answer to AWS Lambda. They recently announced the public beta of Cloud Functions, coupled with an “always free” tier that includes 2 million invocations of Cloud Functions.
Google Cloud Functions are a pretty neat way of hosting your Webhook endpoints at Google-standard reliability and well, free of cost. Read on to find out how to do it!
The Execution Environment
Cloud functions are hosted by a Node.js execution environment, running Node v6.x. This means you have to write your logic as a Javascript function exported from a Node.js module. Dependencies are handled using npm.
Node.js is only supported execution environment, at least currently.
Your Node.js module files have to be zipped up and uploaded to a Google Storage
Bucket for deployment. However, the gcloud command-line can make this a simple
1-step process.
Calling the Function
Your cloud function can be invoked directly as an HTTP(S) endpoint, without any further configuration. You don’t need to configure any other component to do this, unlike AWS’s API Gateway configuration needed for AWS Lambda.
Our First Function
So let’s try it. You’ll need a Google Cloud account of course, and you need to
enable Cloud Functions for your project from this
page.
We’ll call the project my-project in the snippets.
Step 1: First, we need a Bucket. Since apparently Cloud
Functions are available only on the us-central1 zone currently, this means the
bucket has to be either in that region or multi-regional. Let’s just assume you
have one such, called my-bucket.
Step 2: We need to write a Node.js module. The simplest thing we can do is
to create a directory, and create a file in it named index.js, with this
content:
exports.helloWorld = function helloWorld (req, res) {
    res.status(200).send('Hello, world\n');
}
Step 3: Deploy it using the command-line gcloud tool, like this:
$ gcloud beta functions deploy helloWorld --stage-bucket my-bucket --trigger-http --region=us-central1
Copying file:///var/folders/rk/nj_3zqhj47505ws3hzskwjl40000gn/T/tmpClhfD0/fun.zip [Content-Type=application/zip]...
- [1 files][  200.0 B/  200.0 B]
Operation completed over 1 objects/200.0 B.
Waiting for operation to finish...done.
Deploying function (may take a while - up to 2 minutes)...done.
availableMemoryMb: 256
entryPoint: helloWorld
httpsTrigger:
  url: https://us-central1-my-project.cloudfunctions.net/helloWorld
latestOperation: operations/cmFwaWRsb29wLW9wc2Rhc2gtcHJvZC91cy1jZW50cmFsMS9oZWxsb1dvcmxkL1FLcGZNYmU2SU1F
name: projects/my-project/locations/us-central1/functions/helloWorld
sourceArchiveUrl: gs://my-bucket/us-central1-helloWorld-ixorndpatthz.zip
status: READY
timeout: 60s
updateTime: '2017-03-23T04:18:12Z'
And that’s it! Our webhook is ready. Let’s test it out:
$ curl https://us-central1-my-project.cloudfunctions.net/helloWorld
Hello, world
A Useful Webhook
Let’s set up a real-life webhook now.
The OpsDash server monitoring service supports webhooks that are notified when servers go down, or trip alert thresholds. Plivo has APIs that can be used to send SMS texts to your phone. Let’s connect both so you can receive OpsDash notifications on your phone.
Let’s update our index.js to this:
var request = require('request');

exports.helloWorld = function helloWorld (req, res) {

  // details for the SMS we want to send
  var plivoReq = {
    'src':  '14151112222',
    'dst':  '14153334444',
    'text': 'OpsDash: ' + req.body.status,
  }

  // make the plivo API call
  var options = {
    method: 'POST',
    uri:    'https://authid:authtoken@api.plivo.com/v1/Account/authid/Message/',
    json:    plivoReq,
  };
  request(options, function (error, presp, pbody) {
    res.status(200).send(pbody);
  })

};
You’ll of course, need to have a Plivo account, and substitute the “authid” and “authtoken” values, as well as phone numbers in the snippet above.
OpsDash webhooks send a JSON object as the request body, and this object contains the property “status”, which is a human-readable alert status, like “1 down, 1 warning”. See the docs for more info.
The code above now contains a dependency – the request module. You can do the
usual npm install --save request dance, or just create a package.json with
the contents:
{
  "dependencies": {
    "request": "^2.81.0"
  }
}
Finally, let’s add our Webhook into OpsDash:
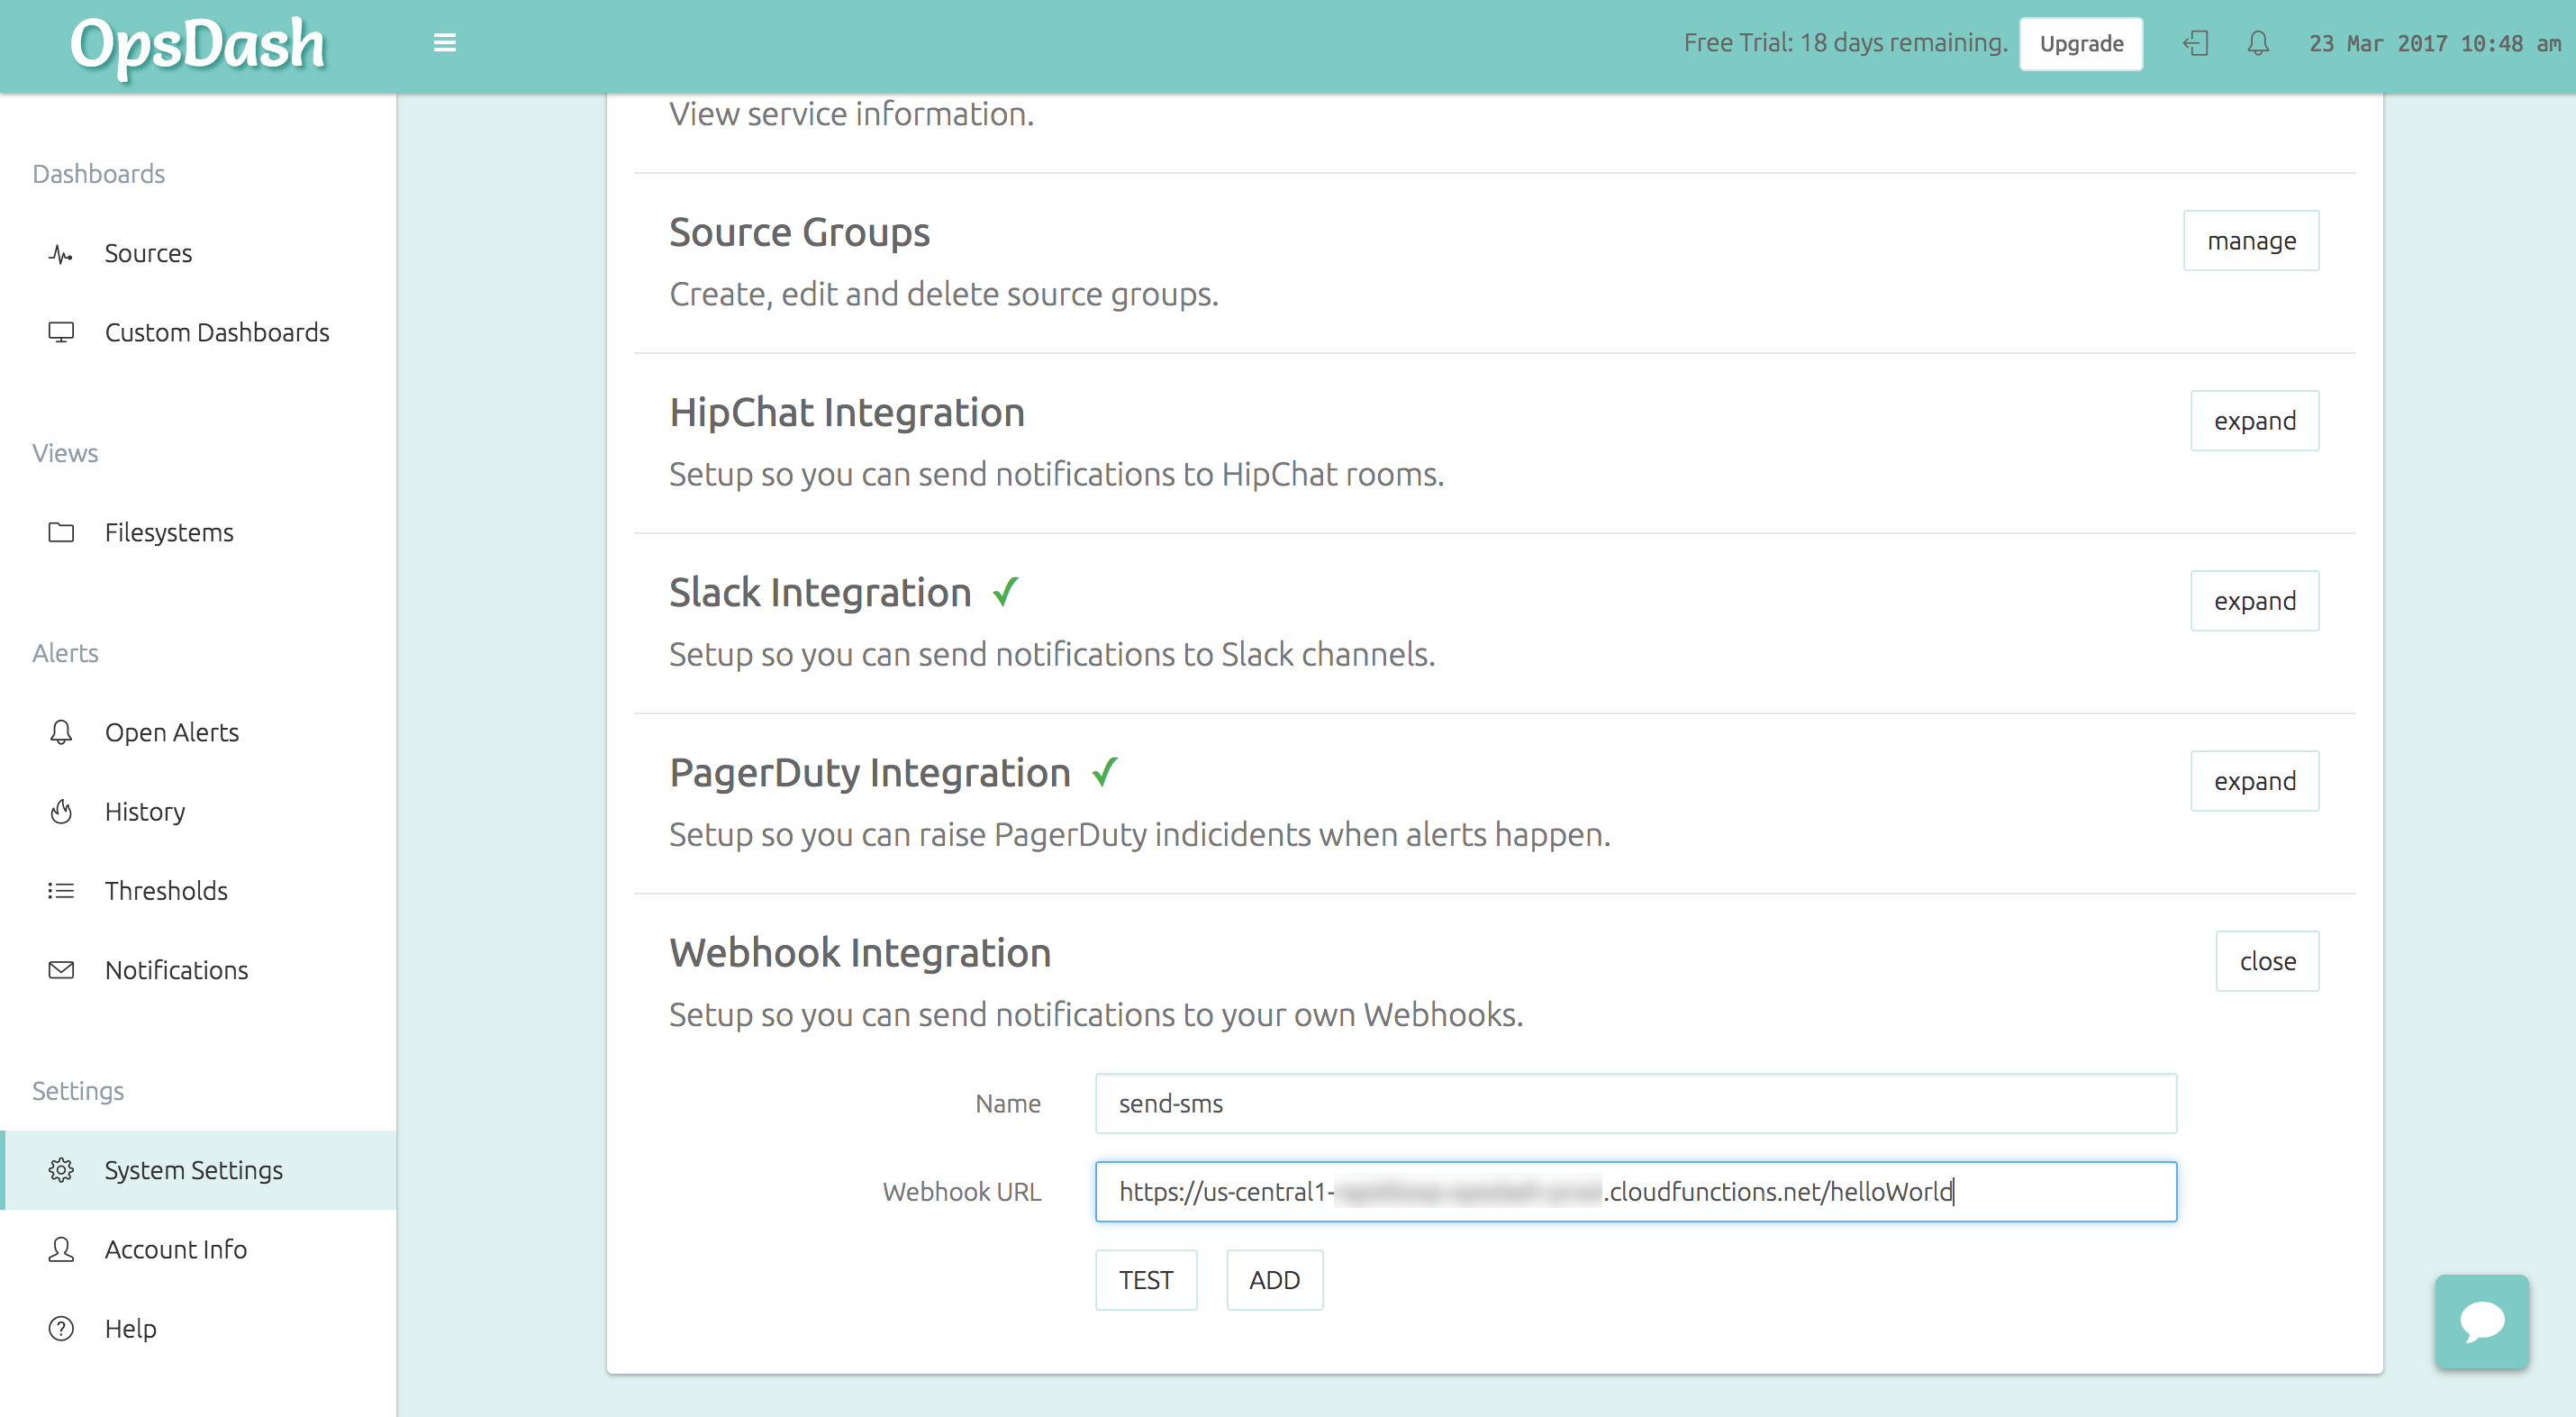
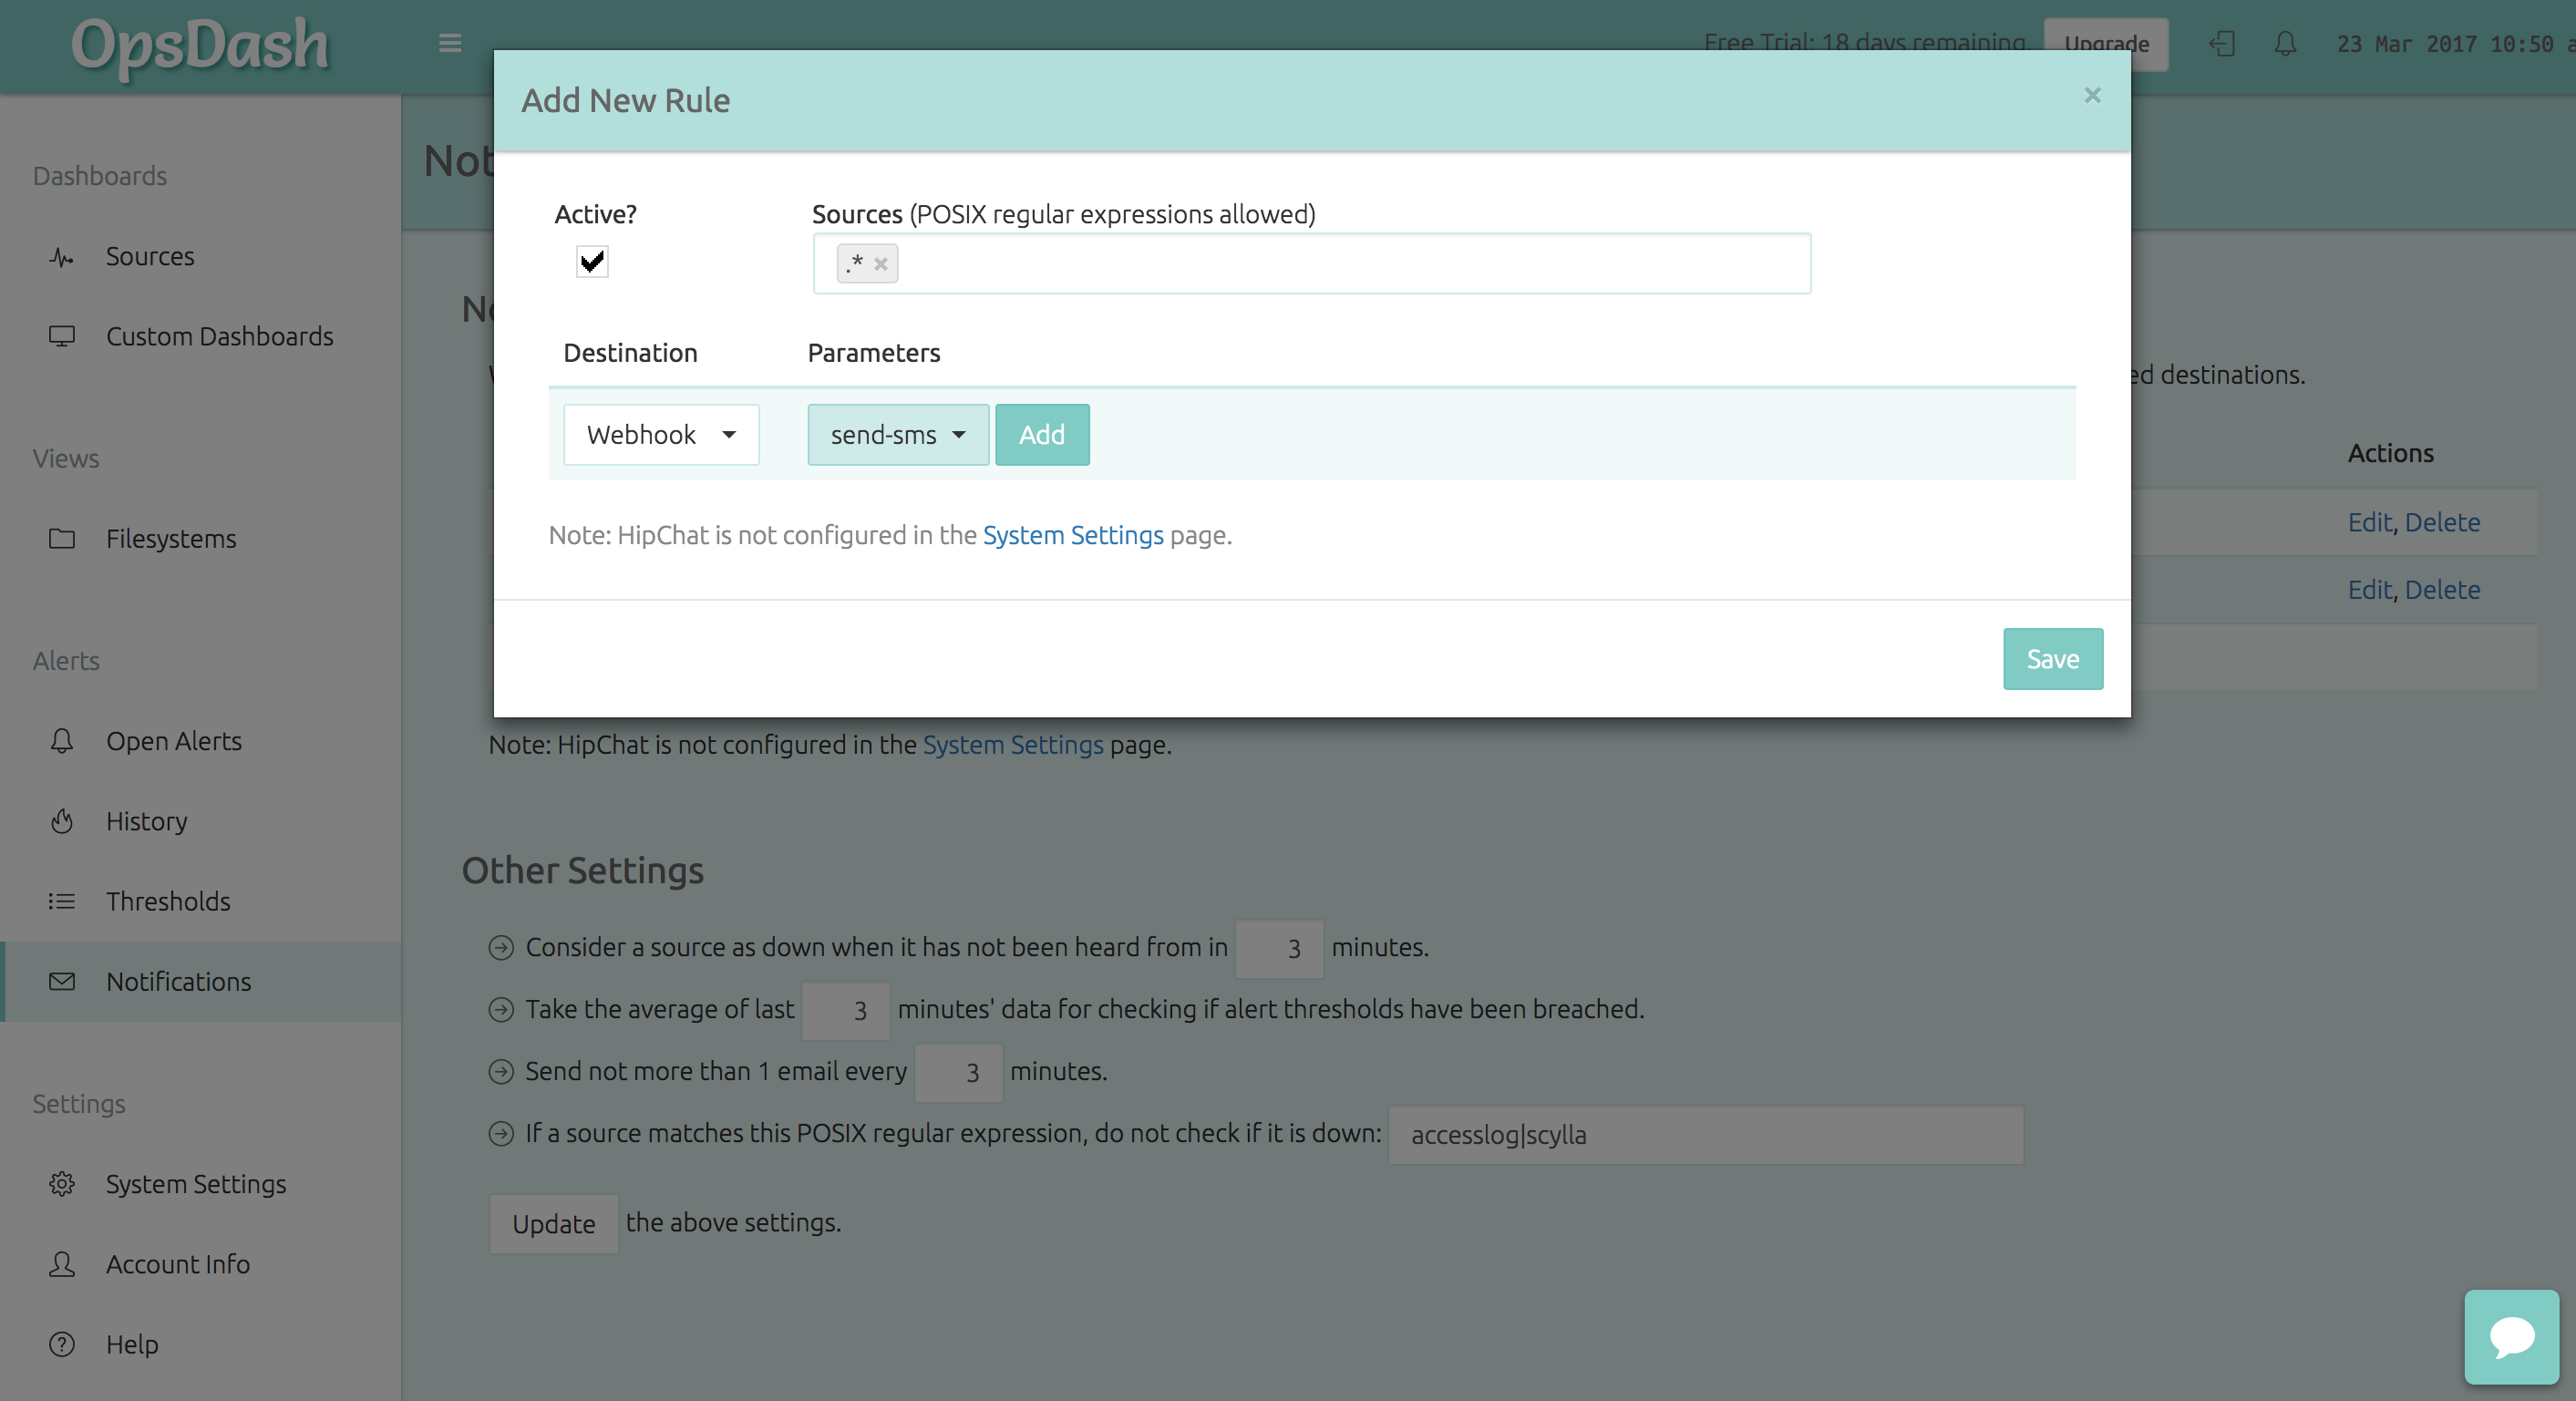
and tell OpsDash that we want notifications about all sources to go here:
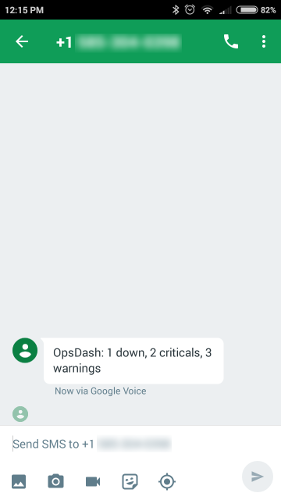
And that’s it! You’ll now be able to receive OpsDash alerts as SMSes on your phone:
Further Reading
- Google Cloud Functions can also be triggered by other means, and do more cool things. Check out the docs for more info.
- Plivo and Twilio are popular options for integrating voice and SMS capabilities into your product.
- OpsDash can monitor your servers, databases and services and tell you when things go wonky.
New Here?
OpsDash is a server monitoring, service monitoring, and database monitoring solution for monitoring MySQL, PostgreSQL, MongoDB, memcache, Redis, Apache, Nginx, Elasticsearch and more. It provides intelligent, customizable dashboards and spam-free alerting via email, HipChat, Slack, PagerDuty and Webhooks. Send in your custom metrics with StatsD and Graphite interfaces built into each agent.